![]() Cross-platform transfer solution for all smartphone users to transfer content between Android and iOS, transfer data from iTunes, iCloud, iTunes library to mobile phone.
Cross-platform transfer solution for all smartphone users to transfer content between Android and iOS, transfer data from iTunes, iCloud, iTunes library to mobile phone.
How to Use PanFone Data Transfer
How to Register PanFone Data Transfer Windows version
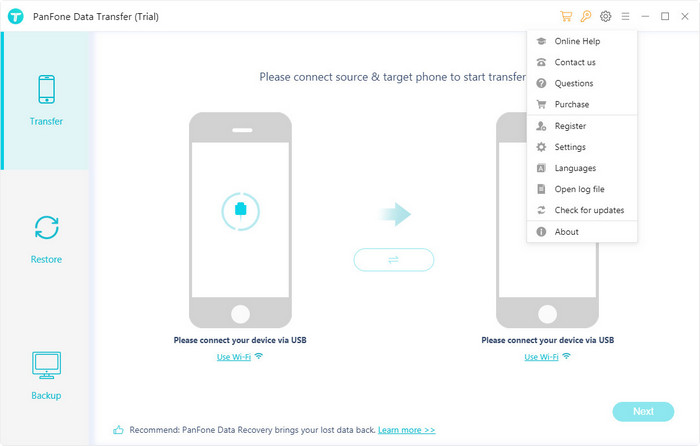
Step 1. Click menu button on the right corner of the program interface
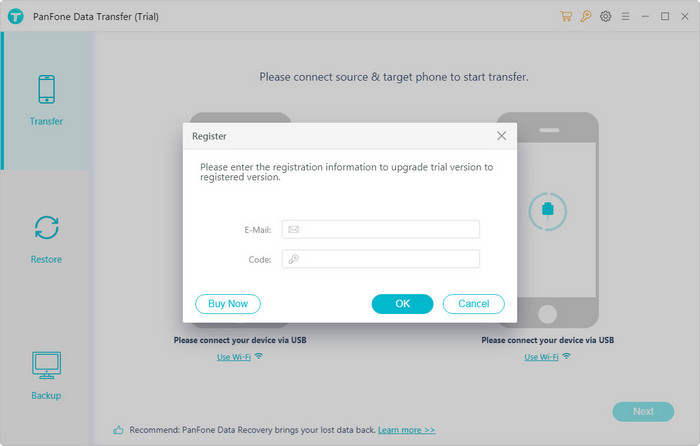
Step 2. Choose Register in the drop-down list, you will get the register window below.
Step 3. Copy and paste the Email and Code into the registration popup dialog.
Note: The registration contents are case sensitive. Please do not add blank at the beginning or the end of the word.
Now, let's learn how to use PanFone Data Transfer.
How to Transfer Contacts, Messages, Music, Photos and More between Two Devices
Step 1. Connect Two of Your Devices to Computer
To start with, run the program and connect two devices (they can be an Android phone or tablet, iPhone, iPad and iPod touch) to your computer via USB cables. When your devices are connected and recognized by your program, your devices will show in the window as follow.
Note: iTunes must be installed to make sure the program work properly. Since it needs certain data from iTunes to do the sync.

Here take iDevice for example. The names of your devices will be displayed in the places of "Source" and " Target". You can click "Flip" to change which one be the source and the targeted phone.
Step 2. Enable USB debugging mode - for Android device ONLY (Optional)
![]() For iOS devices, please scroll down.
For iOS devices, please scroll down.
Android users may encounter below situations:
* Install USB Driver for Android
Generally the computer will auto install the proper driver when connecting your New Android smartphone or tablet via USB. Without the drivers or when they are not installed properly, the computer won't be able to detect your device.
Note: If you have installed proper driver before, you can skip this step.
* Enable USB debugging
USB debugging mode must be enabled in order to let PanFone Data Transfer to set up your android phone. For Android 6.0 or above, please refer to the tutorial below.
Note: If you have enabled USB debugging on your device before, you can skip this step.
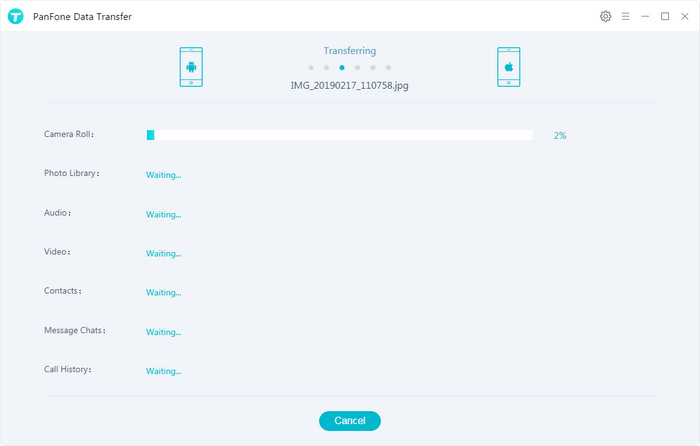
Step 3. Start to Transfer Data from One Phone to Another
After you connected two devices successfully, click on "Next" button. Now, you are allowed to select your desired data to transfer. Check your desired data or select all, after loading completed, click on "Start Copy" to start transfer process. The selected files would be fully copied to your target phone.
How to Backup and Restore Phone Data
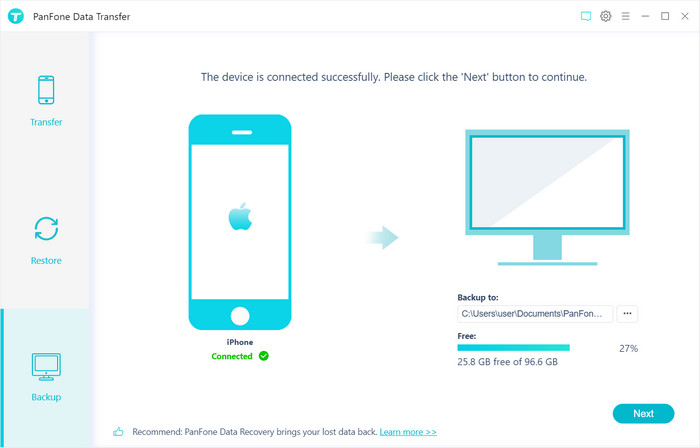
How to Backup Phone Data to the Computer
Firstly, run PanFone Data Transfer and select "Backup" mode on the main interface. Connect your device to the computer with an USB cable, customize the backup folder if you want, and then click on "Next" button. Then you are allowed to select your desired data to transfer. Check your desired data or select all, after loading completed, click on "Start Copy" to start backup process. After a while, all selected contents will be backed up to the computer.

How to Restore Phone from the Saved Backup
Similarly, run PanFone Data Transfer and select "Restore" mode on the main interface. Connect your device to the program and select "PanFone Backup", "iTunes Backup" or "iCloud Backup" on the middle of the panel, PanFone Data Transfer will list all backups you made after you clicked, choose one and click on "OK" to continue, hit "Next" and select desired file type to restore.
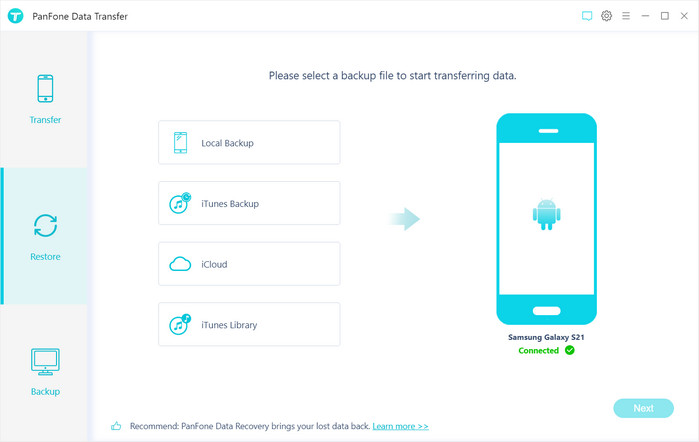
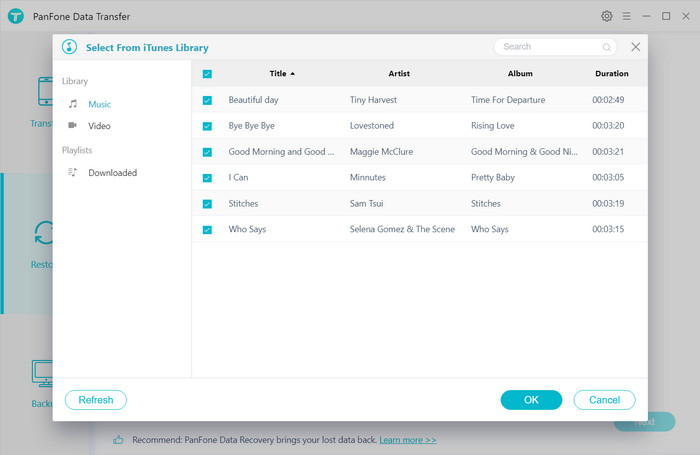
How to Transfer iTunes music and playlist to Mobile Phone
Similarly, run PanFone Data Transfer and select "Restore" mode on the main interface, click on "iTunes Library" button, PanFone Data Transfer will list out your iTunes library on the middle of the panel. Simply select your desired ones to transfer to your device.