Quick Navigation
How to register
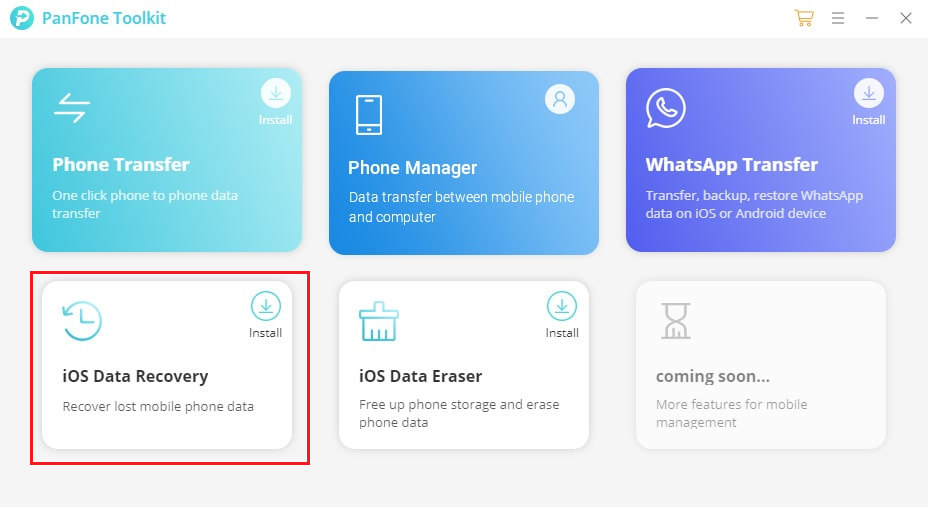
Step 1. On the start-up interface of PanFone Toolkit, please choose "iOS Data Recovery" to download PanFone iOS Data Recovery. After the installation, tap "iOS Data Recovery" again to launch it.
Step 2. Click on the icon on the top right of the program.
Input the Registration Email and Code manually or copy and paste the Email and Code into the registration popup dialog.
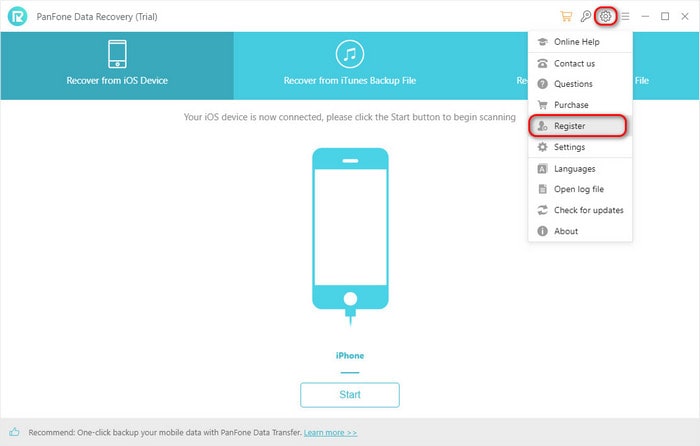
Note: The registration contents are case sensitive. Please do not add blank at the beginning or the end of the word.
How to Recover Deleted Data by Scanning iOS Device
This mode allows you to scan your iOS devices to recover lost or deleted data, including contacts, text messages, photos, call history, notes, calendars, Viber/Kik/WhatsApp data, safari history and more from iPhone 12/iPhone 11/11 Pro/11 Pro Max/XS Max/XS/X/8/7/6/5S/5C/5/4S/4,all iPads and iPod touch 1-7 generation.
Note: When you notice that you've accidentally deleted or lost an important file, do not save anything else on your device or make any operation, as well as running any applications. Whenever new data is written to your device, the old file will be overwritten and become unrecoverable.
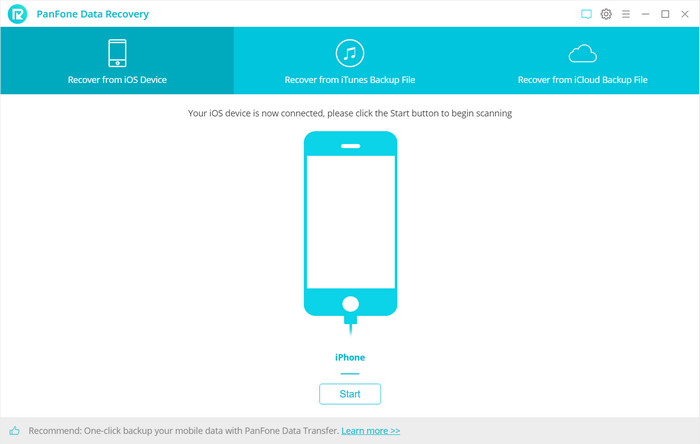
Step 1. Connect your iOS device to PC and launch PanFone iOS Data Recovery
Run PanFone iOS Data Recovery, you will see the Home interface providing three recovery modes, click on the Recover from iOS Device mode, you will get the connecting your device to PC prompt. Connect your iPhone, iPad or iPod Touch to the computer with a USB cable. Once the device gets detected and analyzed successfully, you will get the following interface.
Step 2. Scan your connected iOS device
After clicking on the "Start Scan" button below your device name, the program will begin to analyze and scan the connected device. Once you are in, please kindly wait for some time for the program to finish scanning your device. During the scan, please keep your device connected, otherwise the progress will terminate and you have to start it over again.
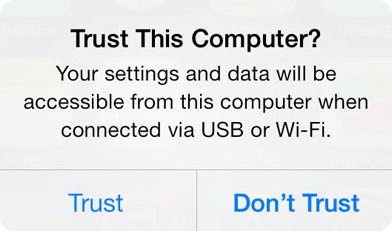
Note: If your device is running iOS 7 or above and protected with a password, please unlock it first, and tap trust on the prompt on your device to authorize this computer.
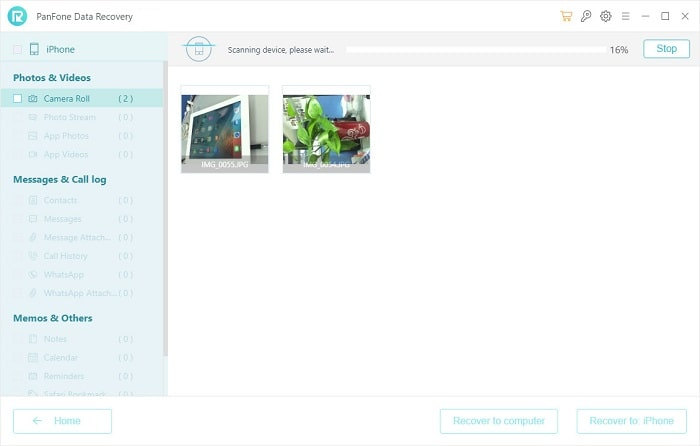
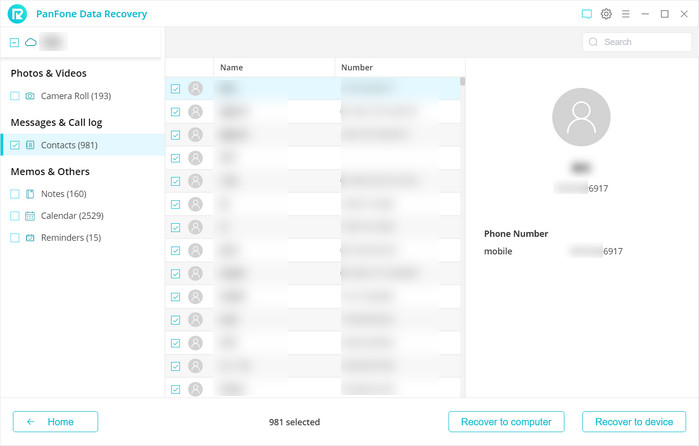
Step 3. Preview and get your lost data back
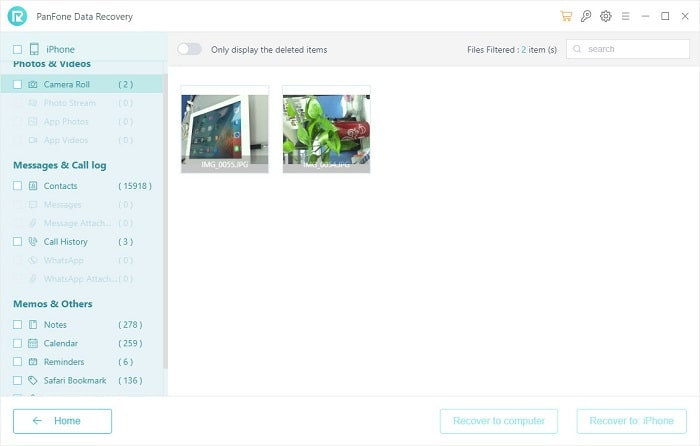
Once the program finishes the scan, the found data is categorized in the main three types: Photos & Videos, Messages & Call logs, Memos & Others. You can click on each tab to switch and preview the found data, then recover the files selectively.
Retrieve Lost iPhone, iPad & iPod Touch Data from iTunes Backup
This solution works well for all iPhone, iPad and iPod touch. It lets you extract and access the iTunes backup file of your iOS device on your computer. Then you can get whatever you want from it. There’s no need for you to connect your iOS device with the computer when using this solution.
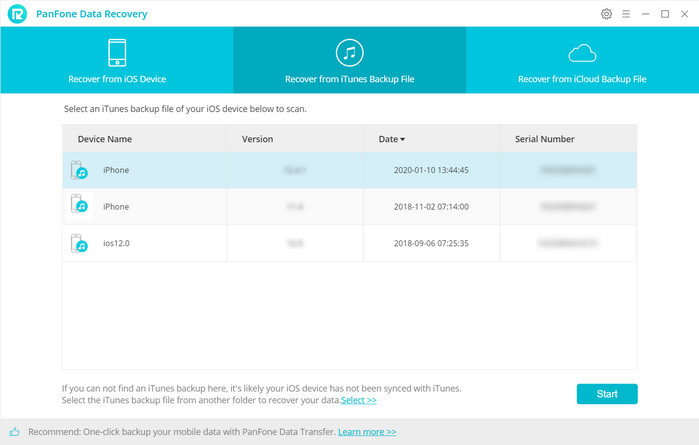
Step 1. Select your iTunes backup and extract it
Please select the Recover from iTunes backup option on the top after running PanFone iOS Data Recovery. Then you can see the program displayed all the iTunes backup files for your iPhone, iPad and iPod touch in a list as follows. Choose the one you would like to access and click on the Start Scan button when it comes up to enter into the next step.
Step 2. Preview and perform iOS data recovery from iTunes backup file
When the scan over, you will find all the backup files are listed and displayed in categories. Click the file types and you can preview the files in thumbnails on the right of the program interface.
The "Search" box on the upper right interface allows you to pick out your desired files quickly by inputting file names or file formats that you remember.
If your desired data is not found in this iTunes scanning result, you can click on the 'Home" button to return to select another iTunes backup file or recovery mode.
After you click on the "Recovery" button, you will get two options: Recover to Computer or Recover to Device. Currently, PanFone iOS Data Recovery can support recovering Contacts, Notes, Camera roll, Photostream, SMS, Call history, WhatsApp, Bookmarks and Voice memo to the device. We will continue to support more file types.
Recover iCloud Data
The steps of scanning iCloud data are similar to iTunes backup. PanFone iOS Data Recovery lets you download and extract your iCloud contents, so that you can get what you want from it one by one.
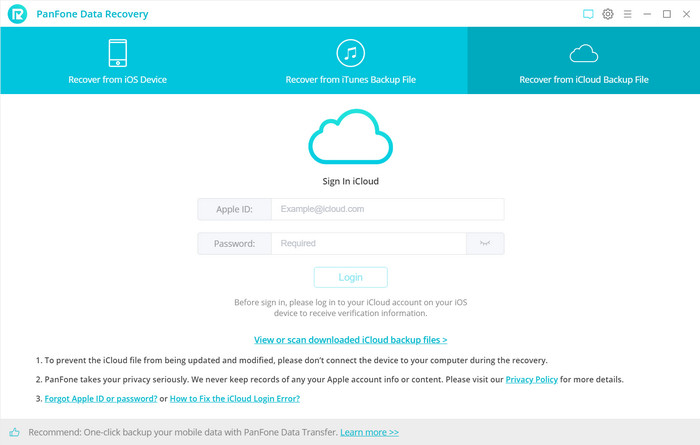
Step 1. Log in iCloud
Please select Recover from iCloud backup mode after running PanFone iOS Data Recovery. Then enter your iCloud account to sign in. When you do this, make sure that your internet connection is in good condition.
Note: It's totally safe to sign in your account here. We take your privacy seriously, and the program won't keep any record of your account and data at any time during your sessions.
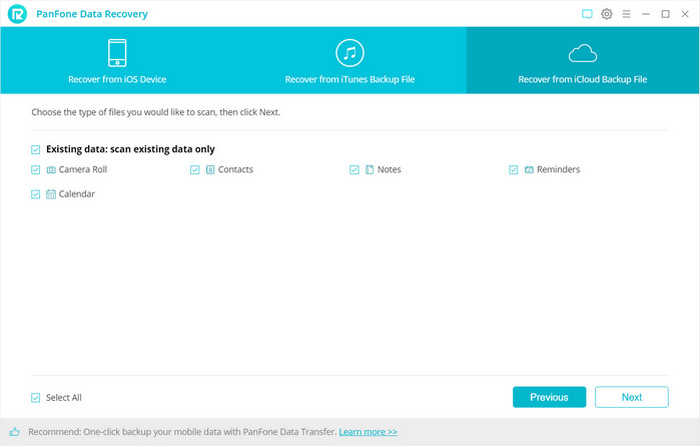
Step 2. Choose iCloud Data You Want to Download
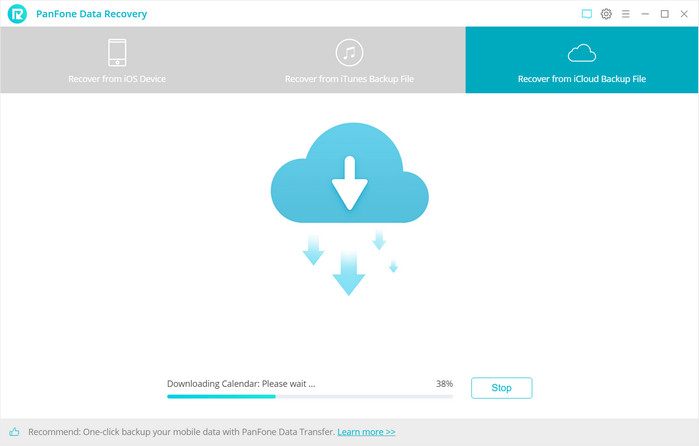
Now you can see that photos, contacts, notes, reminders and calendars are all supported to access. Choose the one you want to access and then click on the Next button to start downloading. If it’s the first time you download the iCloud data via PanFone or there’re a large amount of files on it, it will take some time. Please wait till complete.
Step 3. Preview the Content and Extract to Computer/Device
Once the downloading is completed successfully, you can view the details by tapping the tabs on the left bar. Then check the item(s) you want to recover and click the "Recovery" button at the bottom of the program pane. You will be prompted to choose Recover to computer or Recover to device, you can easily save all of them to your computer or directory put them back to the device.
Recover to computer: If you’re going to retrieve the selected iCloud data to computer, you can choose this button. The contacts (also support VCF format), notes, calendars and reminders can be exported as readable HTML and CSV files and the pictures will be exported as original format. Choose a backup path on computer and click Recovery option to confirm.
Recover to device: If you’re going to recover the iCloud data back to your iOS devices, tap on this button. And then click Recovery to get started.