Quick Navigation
How to Register
Step 1. Click menu button on the right corner of the program interface.
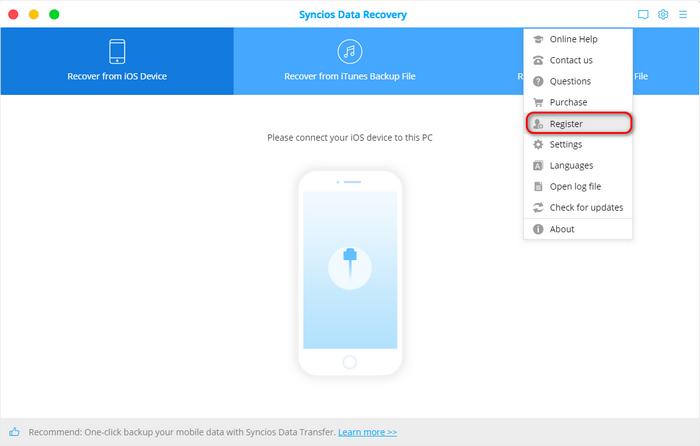
Step 2. Choose Register in the drop-down list, you will get the register window below.
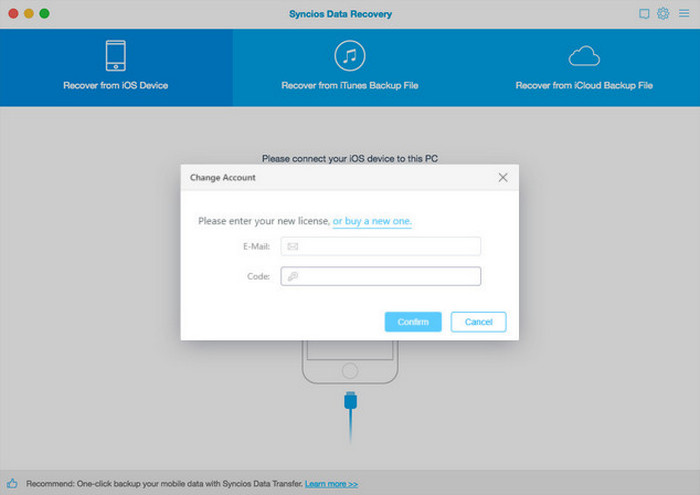
Step 3. Copy and paste the Email and Code into the registration popup dialog.
How to Recover Data from iOS Device Directly
This mode allows you to scan your iOS devices to recover lost data or deleted data, including contacts, text messages, iMessages, call history, notes, calendars, reminders and safari bookmarks from your newest iPhone, iPad or iPod.
Note: Please don't use your device after you lost data. Because any operation on your device will generate new data, which can overwrite the lost data and make it unrecoverable.
Step 1. Connect iOS Device to Computer
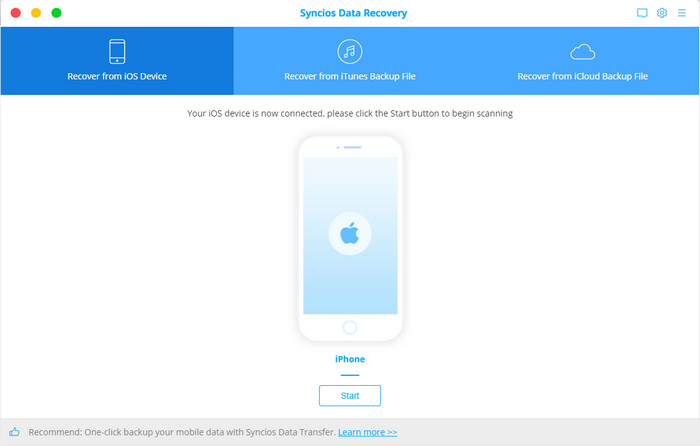
By default, run PanFone Data Recovery program to recover from iOS Device on your Mac, insert the USB cable for the iPhone into the iPhone's docking port, and insert the alternate end into your computer's USB port, once connected, you will get the interface like below:
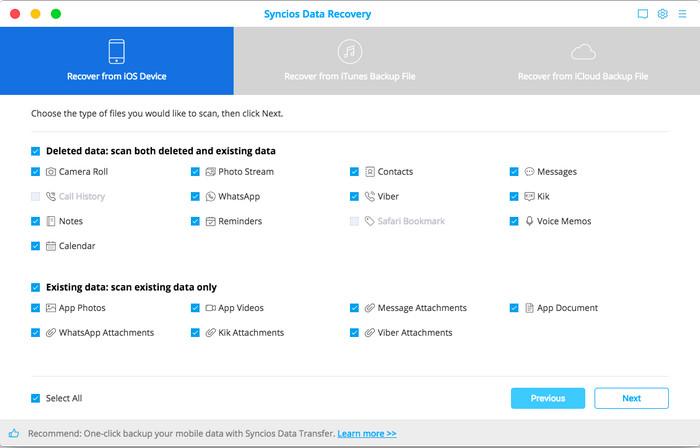
Step 2. Select File Types to Scan and Recover.
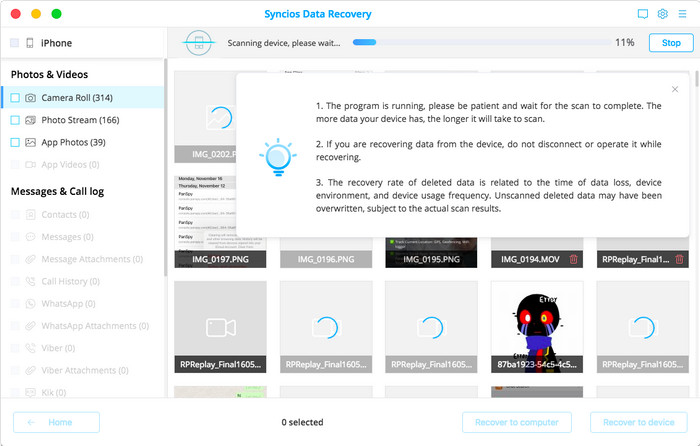
Once your device is recognized and connected successfully, click "Start", and you are allowed to select desired data before scanning. Then redirect you to scanning interface. The scan process will take you several seconds to minutes for scanning depending on the file size stored on your device.
During the scan, make sure that your device is connected well and don't disconnect it for any reason, or you need to start it over.
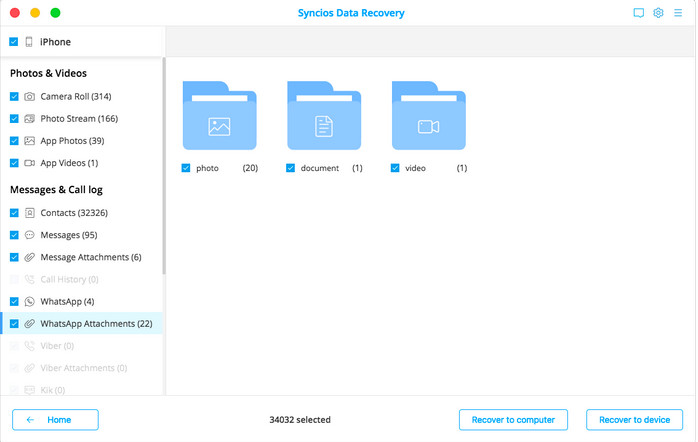
Step 3. Preview and get back lost data from your iPhone, iPad or iPod Touch
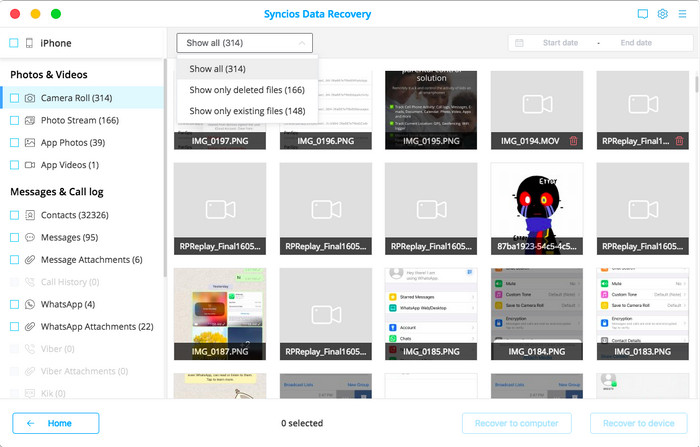
After scanning, found data on your iOS device will be shown according to file types. You can preview them one by one so as to check how much of your lost data can be recovered. Then you can tick the files you need and click the Recover button to save them to your computer.
Note: You are allowed to switch "Show Only deleted files" to ON, so you could preview the lost files only.
How to Recover iOS Data from iTunes Backup
This solution works well for all iPhone, iPad and iPod touch. It lets you access to and extract the iTunes backup file of all your iOS device on your computer. Then you can get whatever you want from it. There’s no need for you to connect your iOS device with the computer when using this solution.
Step 1. Select your iTunes backup and extract it
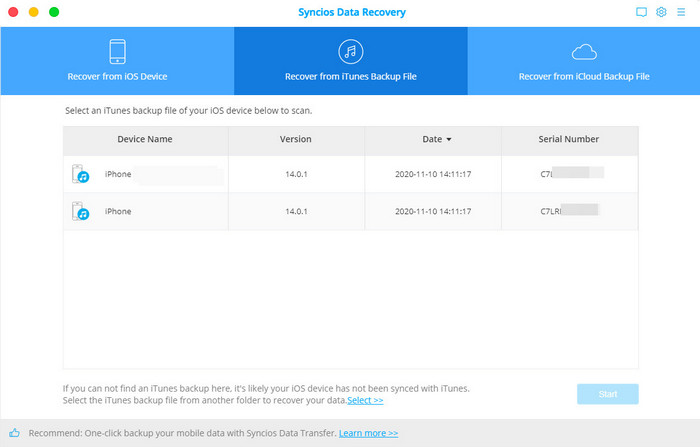
Please select the Recover from iTunes backup option on the top after running PanFone Data Recovery. Then you can see the program displayed all the iTunes backup files for your iPhone, iPad and iPod touch in a list as follows. Choose the one you would like to access and click Start button when it comes up to enter into the next step.
Step 2. Preview and restore data from iTunes backup file
Once the program finishes scanning, you can begin previewing all extracted files on the panel. Then please select your lost files and click "Recover to device" or "Recover to Computer" to recover the found data.
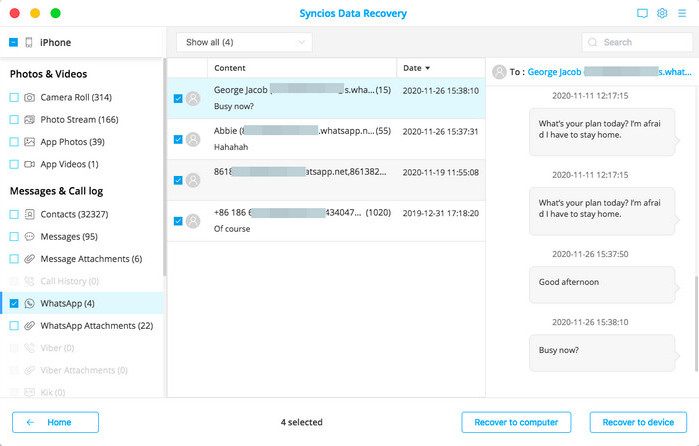
E.g. Restore WhatsApp Messages and Attachment
How to Recover iOS Data from iCloud Files
PanFone Data Recovery lets you download and extract your iCloud data to your computer then you can scan and restore the data you want.
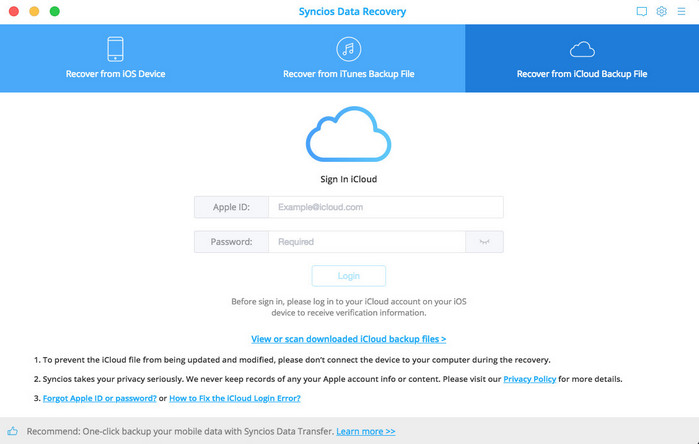
Step 1. Sign in iCloud
Please select Recover from iCloud mode after running PanFone Data Recovery. Then enter your iCloud account to sign in. When you do this, make sure that your internet connection keeps working fine.
Step 2. Download the iCloud data you want
On the page, you can see the data type supported to be downloaded, including photos, contacts, notes, reminders and calendars.
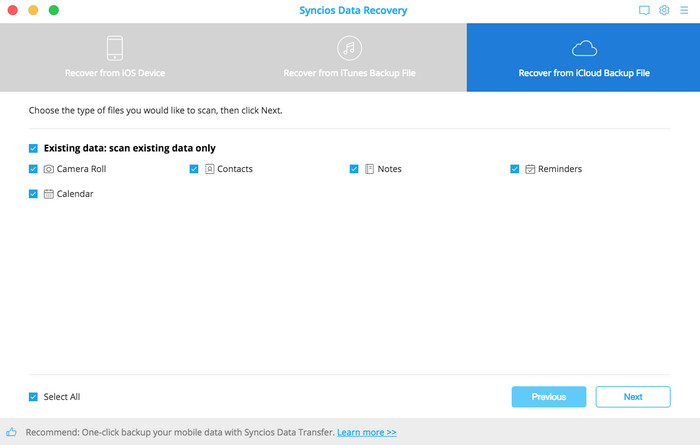
Check the types of data you would like to download and click Next button to begin. Then wait until it's complete. If it’s the first time you download the iCloud data via PanFone Data Recovery or there’re a large amount of files on it, it will take you some time.
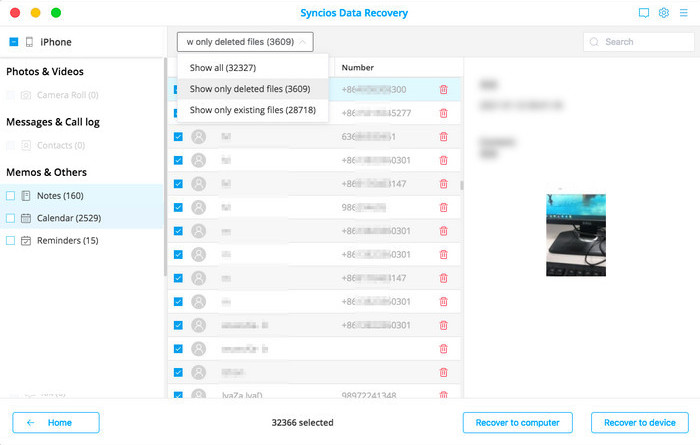
Step 3. Preview and recover data
Once the downloading is completed successfully, you can preview the detail content by tapping the tabs on the left bar. Then check the item(s) you want to recover and click the Recovery button.
Recover to computer: If you’re going to retrieve the selected iCloud data to computer, you can choose this button. The contacts (also support VCF format), notes, calendars and reminders can be exported as readable HTML and CSV files and the pictures will be exported as original format. Choose a backup path on computer and click Recovery option to confirm.
Recover to device: If you’re going to recover the iCloud data back to your iOS devices, tap on this button. And then Click Recover to begin.