![]() Cross-platform transfer solution for all smartphone users to transfer content between Android and iOS, transfer data from iTunes, iCloud, iTunes library to mobile phone.
Cross-platform transfer solution for all smartphone users to transfer content between Android and iOS, transfer data from iTunes, iCloud, iTunes library to mobile phone.
![]() > How-To >How to Deal with iPhone Storage Almost Full? 5 Ways to Instantly Free it Up!
> How-To >How to Deal with iPhone Storage Almost Full? 5 Ways to Instantly Free it Up!
How to Deal with iPhone Storage Almost Full? 5 Ways to Instantly Free it Up!
If you are running out of iPhone storage space, it may not be your first choice to buy a new one. Even though we are familiar with the fact that the storage space is going up as the higher price you paid for your iPhone. There are lots of things you can do to release certain space on your iPhone. So before resorting to getting a new one, try these quick ways to help fix an iPhone out of storage! (iPhone here can refer to iPhone 4/5/6/7/8, iPhone XS, iPhone XR, iPad series and iPod Touch 1-6 generation.)
 1.Clear out Junk Files and Temp Files on Your iPhone
When you are browsing on Safari or other social apps on your iPhone, something is processing before you realize it. The data you viewed will be automatically saved as temp files. Some of them are useless at all so that they could be junk files taking up the space on your iPhone. These caches could be Crash Logs, Photo Caches, Downloaded Files, User Storage Files and iTunes Caches. Under this situation, they could in a degree influence the performance of the mobile phone. So you have to do something in time to deal with these files. On this point, you can periodically clear out the junk files and temp files on your phone. If easy and efficient method is your top priority, I’d recommend PanFone iOS Erase Pro, which can quickly scan the junk and temp files on your phone and offer a fast way to remove them forever.
Step 1 Download and install PanFone iOS Eraser Pro on your PC.
Download
Win Version
Buy Now
Win Version
Step 2 Connect your iPhone to PanFone via appropriate USB cable. Special notes about smooth performance for PanFone: Don’t start iTunes and sync files when running the program to avoid data overwriting.
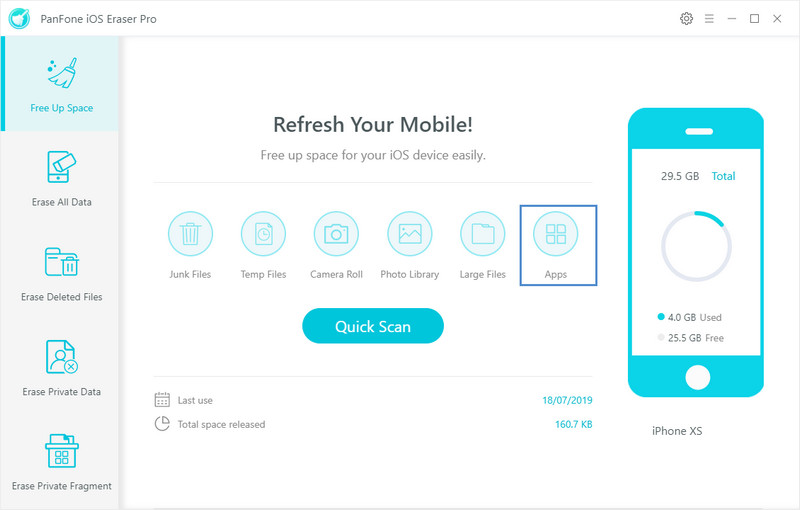
Step 3 Go to 'Free Up Space' mode, you can see options Junk Files and Temp Files displayed on the main interface.
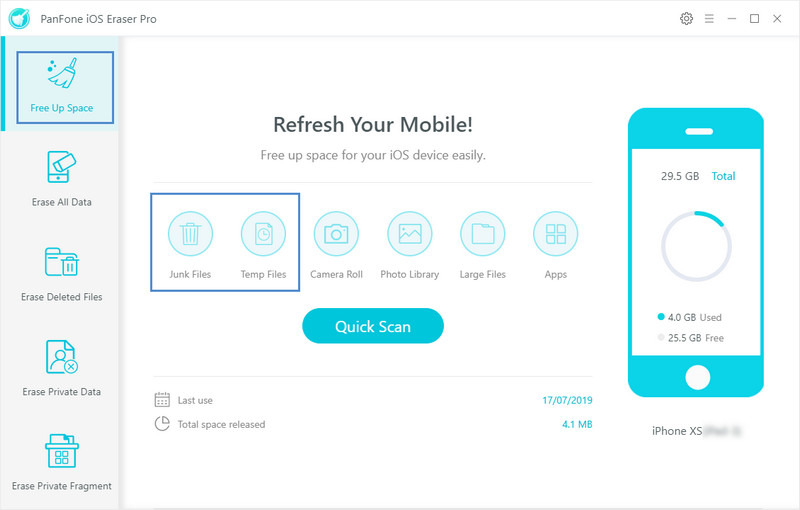
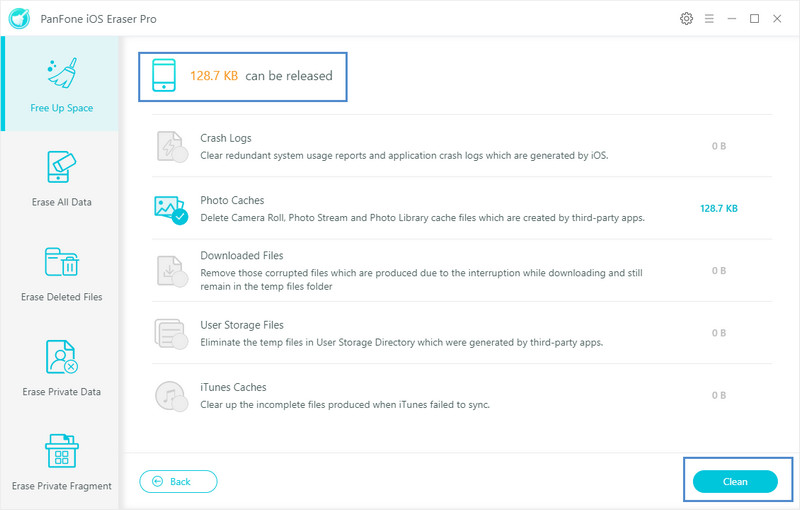
Step 4 Tag on 'Junk files' when PanFone would quickly scan your iPhone and load the targeted files. After finishing the scan, you will have an overview of how much storage each cache is taking up.
Step 5 Individually select the caches and temp files and then click on 'Clean' to permanently delete them.
Step 6 Once done, it would go back to the main interface of the program under Free Up Space mode. You can click on 'Temp Files' and PanFone would smartly clean up the useless data completely.
Optimize Your iPhone Storage by Backing up to Computer
For a good majority of phone users, photos and videos are the number one culprit when it comes to storage issues on iPhone and iPad. Media files can take up incredible amounts of space. Before you decided to manage your storage by directly deleting them off, you can choose a method to free up your iPhone space without loss of your pictures. That is to back up these pictures to computer. Once you have backup these heavy files to your computer, you can save only what you have to and get rid of the rest on the side of iPhone. Similarly, PanFone can help to optimize the limited storage by backing up your photos and free up your iPhone.
Step 1 Turn off iTunes on your PC and connect your iPhone to PanFone.
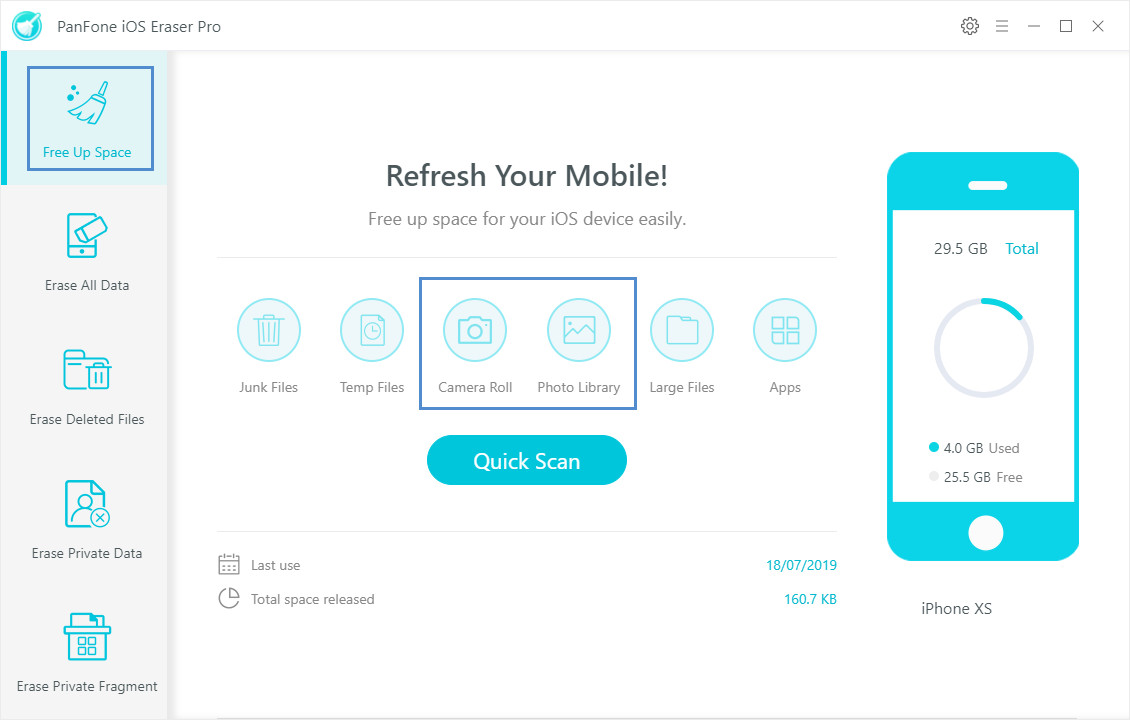
Step 2 Under Free Up Space, click on 'Photo Library'. It takes few minutes for the program to load the photos data.
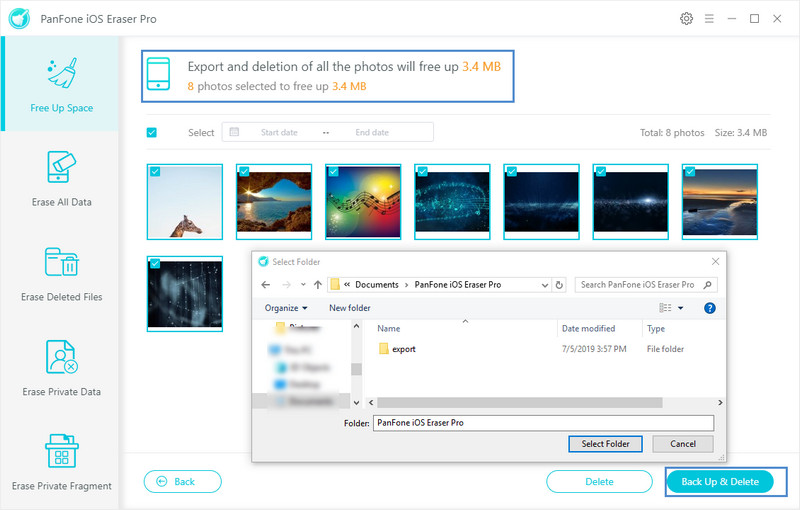
Step 3 Select the photos and click on 'Back & Delete'.
You can see notification warning how much space will be released once you export and delete all the photos. Bellow the interface are two functional buttons. One is Delete meaning that you can do a total deletion of the selected photos. The other is Back & Delete allowing you to back up the photos to PC and then delete them from your iPhone. You can one-click choose all the images. There is a built-in calendar that you can kick on photos according to the date.
3.Uninstall Unnecessary Apps on Your iPhone
This seems like a common method that people would take to fix out the problem of full storage. Make a regular practice of the apps that you are frequently used and sort out those not. If you have not used the app for a long time, you iPhone will pause to update it while the app data inside your phone is stored locally. One thing you should know is that apps you downloaded (paid or free) can be re-download whenever you’ve like since all your purchases are automatically tied to your Apple ID. So that if you are not absolutely need the apps, uninstall them to free up your iPhone space. There’s an easy way to check to what apps that are taking up the most storage on your iPhone or iPad and one-click uninstall those unnecessary. Just follow these steps:
Step 1 Check for the good connection of iPhone and PanFone iOS Eraser Pro.
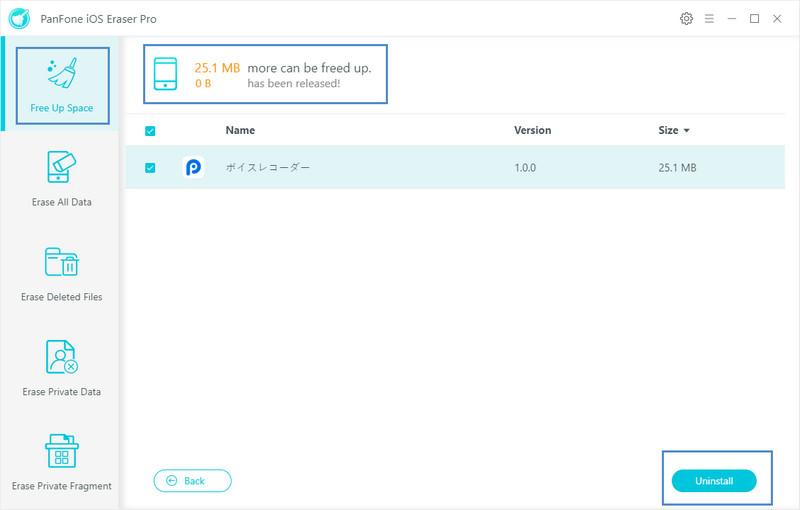
Step 2 Under Free Up Space mode, click on 'Apps'.
Step 3 You’ll see an overview of how much storage each app is occupying. Tap into any one of them will pre-activate the Uninstall button, or you can have a multi-choice of the apps that you are going to delete.
Step 4 Click on 'Uninstall' when it prompts a warning to confirm your choice. Keep in mind that you can re-install them in your App Store as long as you remember your Apple ID and password.
4. Totally Erase Deleted Files on iPhone
Methods mentioned above are to directly delete the files or uninstall apps on your iPhone. Nevertheless, some deletion tasks are independently of each other, causing deleted files remains on the phone. To totally erase these deleted files on your iPhone, we want to erase the deleted files on iPhone not only to release space but to secure our data. Another functionality Erase Deleted Files in PanFone is designed to completely erase your deleted files. Following steps are to kick off the files forever.
Step 1 Turning back to the homepage of PanFone, and this time please go to Erase Deleted Files mode where you can see a button 'Erase' and click on it.
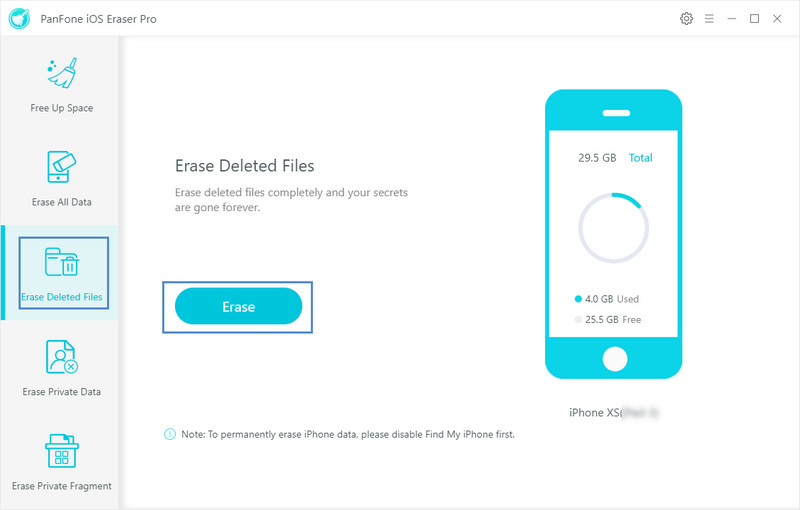
Step 2 Program will scan and detect the records that you have deleted.
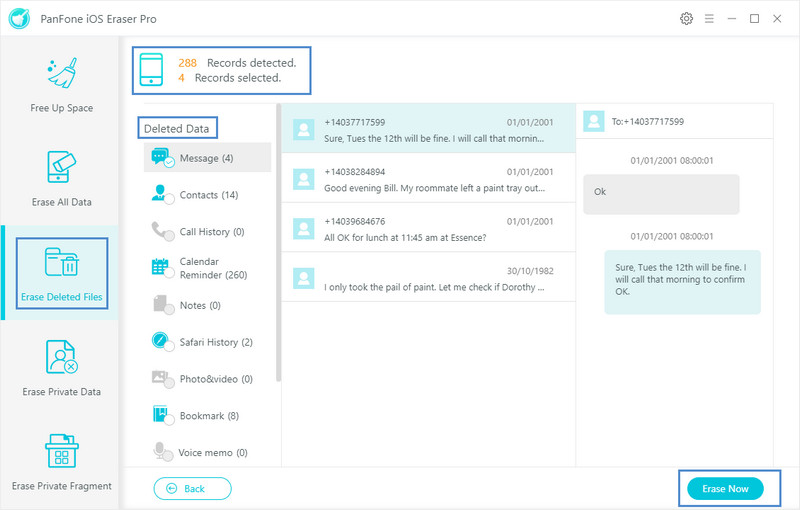
Step 3 On the main interface, you can obviously see a menu list of Deleted Data including Messages, Contacts, Call History, Calendar Reminder, Notes, Safari History, Photo&Video, Bookmark, Voice Memo, WhatsApp, WeChat.
Step 4 Selectively choose the option, Messages for example, and look into detailed information of the files. If you’ve rarely reused these data, then just choose the messages and click on 'Erase Now' to proceed.
Step 5 The same steps go the other items detected. For your data security, you can wholly erase the records detected and get more free space for your iPhone.
5.iCloud Backup
iCloud backup offers option for iPhone users to sync their mobile phone data at hand. So how to back up with iCloud?
Step 1 Go to Settings > [your name] > tap iCloud.
Step 2 Tap iCloud Backup to turn on the key button.
Step 3 Make sure you are on a WiFi connection and tap Back Up Now.
Step 4 Check your backup by tapping Settings > iCloud > Storage > Manage Storage, and then select your device. You should see your latest backup listed.
It is easy to retrieve them at any time while there are two caveats you should pay attention to:If you already run out of the iCloud storage, you can go back to the method 2 and try to backup your photos to computer without limits of the iCloud space.
Download
Win Version
Buy Now
Win Version