![]() Cross-platform transfer solution for all smartphone users to transfer content between Android and iOS, transfer data from iTunes, iCloud, iTunes library to mobile phone.
Cross-platform transfer solution for all smartphone users to transfer content between Android and iOS, transfer data from iTunes, iCloud, iTunes library to mobile phone.
![]() > How-To > How to Permanently Delete Photos from iPhone
> How-To > How to Permanently Delete Photos from iPhone
How to Permanently Delete Photos from iPhone
Before selling your iPhone or giving your iPhone to others, are you worried about your private photos may find out by others even you have deleted the photos on your iPhone in advance? Delete photos completely would be a necessary thing for you to do. iPhone possesses with the built-in function which supports to delete photos completely. But 30 days could be a long term if someone was eager to sell their phone.
Besides, we have other methods for you to solve this problem, you don't need to worry about this because of the PanFone iOS Eraser which can permanently and completely delete photos from your iPhone. Keep reading our passages and you will find the solution.

 Method 1: Use PanFone to Permanently Delete iPhone Photos
Though Apple offers the function of 'permanently delete photos within 30 days', someone may want to delete useless photos instantly. Then how? Here, PanFone - iOS data eraser, the best tool which supports to completely delete useless photos on your iPhone, as well as on your other iOS devices. It is ease to operate and can gain an obvious result.
Download
Win Version
Buy Now
Win Version
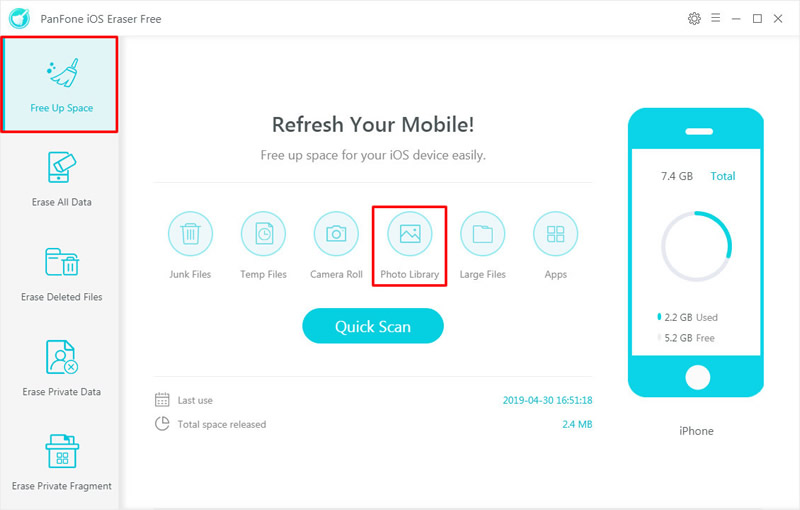
Step 1: Please download and install PanFone on computer first. Launch it and connect iPhone to computer via USB port. There are five main functions show on the left side, simply choose 'Free Up Space' which we need to use in this part. PanFone offers to free up your space by deleting useless junk files, temp files, camera roll, photo library, large files and apps. Click 'Photo Library' for next step.
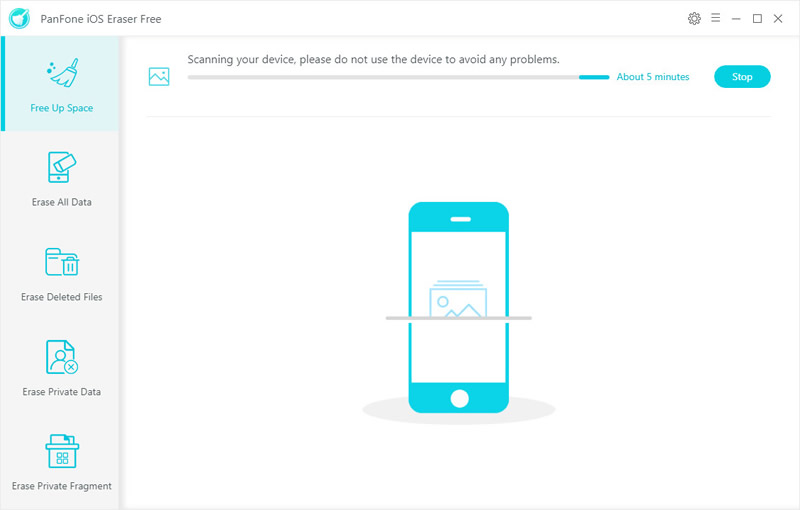
Step 2: Wait for PanFone to scan all photos you saved or screenshots on iPhone. It will take some time if you have amount of data.
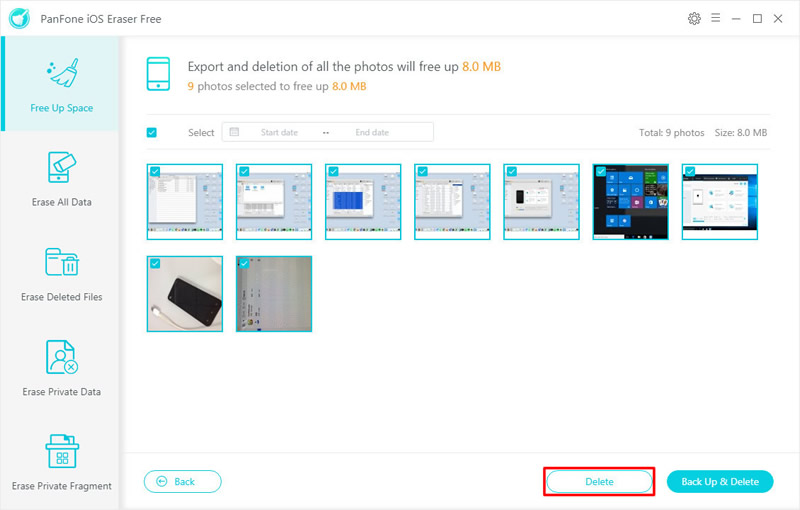
Step 3: After all photos have shown up on screen, you can select the one you want to delete permanently. PanFone will tell you how much space do they occupied, in other words, you can free up this space once you delete them forever. What's more, you can make a backup before delete them. If you don't need to, just click 'Delete' button and these photos will not be exist on your iPhone anymore.
*If you encounter any detection problem during the process, please click here to fix.
Method 2: Delete Photos on your iPhone with its Built-in Features (iOS 11 & iOS 12)
If you can wait for 30days to remove photos completely on your iPhone, you can use iPhone's build-in function - remove your photos from the Recently Deleted Album. But the operation form will be a slightly different between iOS 12 version and the previous version. Don't panic, we will show you the specific steps in next paragraph.
 For iOS 11 & Previous iOS version
Step 1: Select or drag photos to delete photos in certain photo album.
- Go to 'Photos'.
- Pick the photos.
- Tap 'Trash Bin' icon at the right bottom corner of screen.
- Click on 'Delete Photos' / 'Delete *number* Photos' to confirm delete.
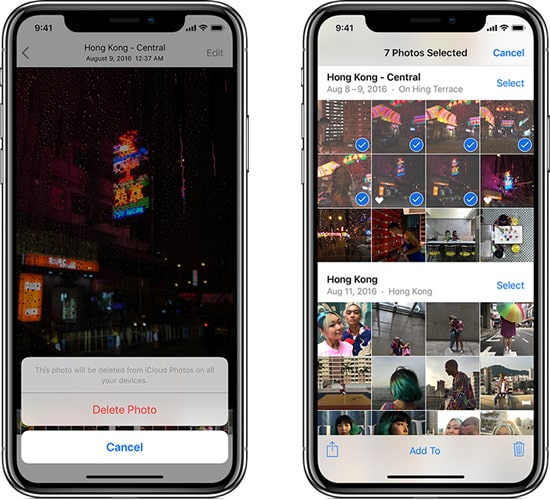
Step 2: Photos you delete in last step will go to 'Recently Deleted Album'. In order to completely and permanently delete them, you need to delete them again in here.
- Tap 'Recently Deleted Album' from Album.
- Tap 'Select' at the top right corner then pick the photos you want to delete for.
- Tap 'Delete' to permanently delete all selected photos on your iPhone.
For iOS 12
- Open 'Photos'.
- Tap 'Album' on the bottom of the screen.
- Scroll to the bottom and choose 'Recently Deleted'.
- Tap 'Select' at the top right corner then pick the photos you want to delete for.
- Tap 'Delete' to permanently delete all selected photos on your iPhone.
Method 3: Delete Photos by iTunes when iPhone Deleting Function isn't Working
Occasionally, due to some reason, iPhone's built-in function may not take effect, you may fail to delete photos and can't find them in trash tin, what cause these happen? These photos are what you have synchronized with iTunes and you don't have the authority to edit them on iPhone directly. But, here is how you can do.
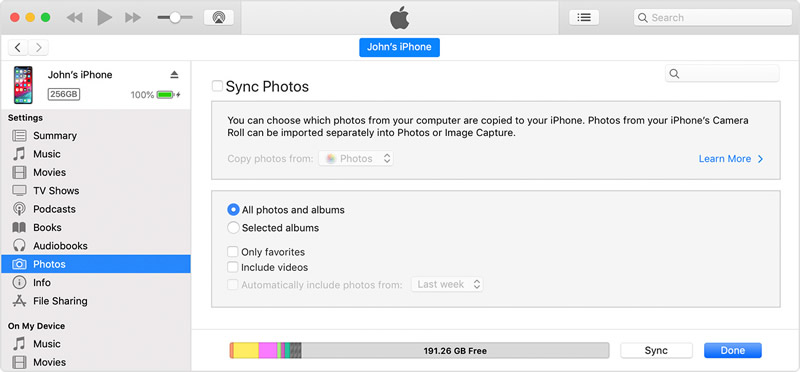
- Launch iTunes on computer and plug your iPhone to it via USB cable, choose the device icon in it.
- Select 'Photos' from the list on the left.
- Uncheck 'Sync Photos' in the top left corner of the main screen selected by default. Then click 'Apply' to successfully delete all photos.
- If you want to delete a part of, you can also uncheck specific photos and click 'Apply' to delete.
Method 4: Reset your iPhone
If you want to sell or give away your iPhone, the easiest thing to delete all photos must be restore your device to factory settings. Not only photos but also other data will all swipe from your iPhone forever. All settings will go back to factory condition.
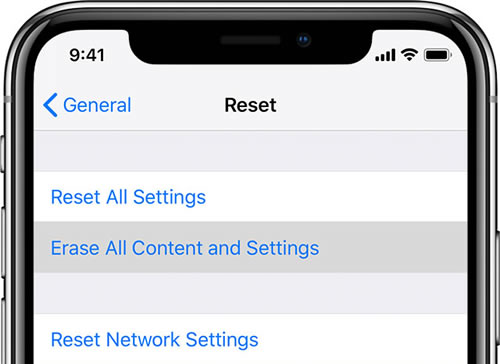
Step 1: Tap Settings > General > Reset on your iPhone. Then tap 'Erase All Content and Settings'.
Step 2: If asked, enter your passcode or Apple ID password. Then confirm that you want to erase your device.
Step 3: Wait for your device to erase. It can take a few minutes to completely erase your data depending on your device.
![]() Summary: Above are 4 methods we provide for you to permanently delete photos on iPhone, there must be one which can solve your problem perfectly. What we highly recommend is PanFone which can not only swipe off all photos but also other kinds of data on your iPhone. Choose the one you like and have a try.
Summary: Above are 4 methods we provide for you to permanently delete photos on iPhone, there must be one which can solve your problem perfectly. What we highly recommend is PanFone which can not only swipe off all photos but also other kinds of data on your iPhone. Choose the one you like and have a try.
Download
Win Version
Buy Now
Win Version